Payment provider of choice
Cascade uses Lemon Squeezy as the merchant of record. Lemon Squeezy is a payment gateway that allows you to accept payments from your customers. It is a secure and reliable payment gateway that supports multiple payment methods. It also handles all tax related things for you.
Setup on Lemon Squeezy side
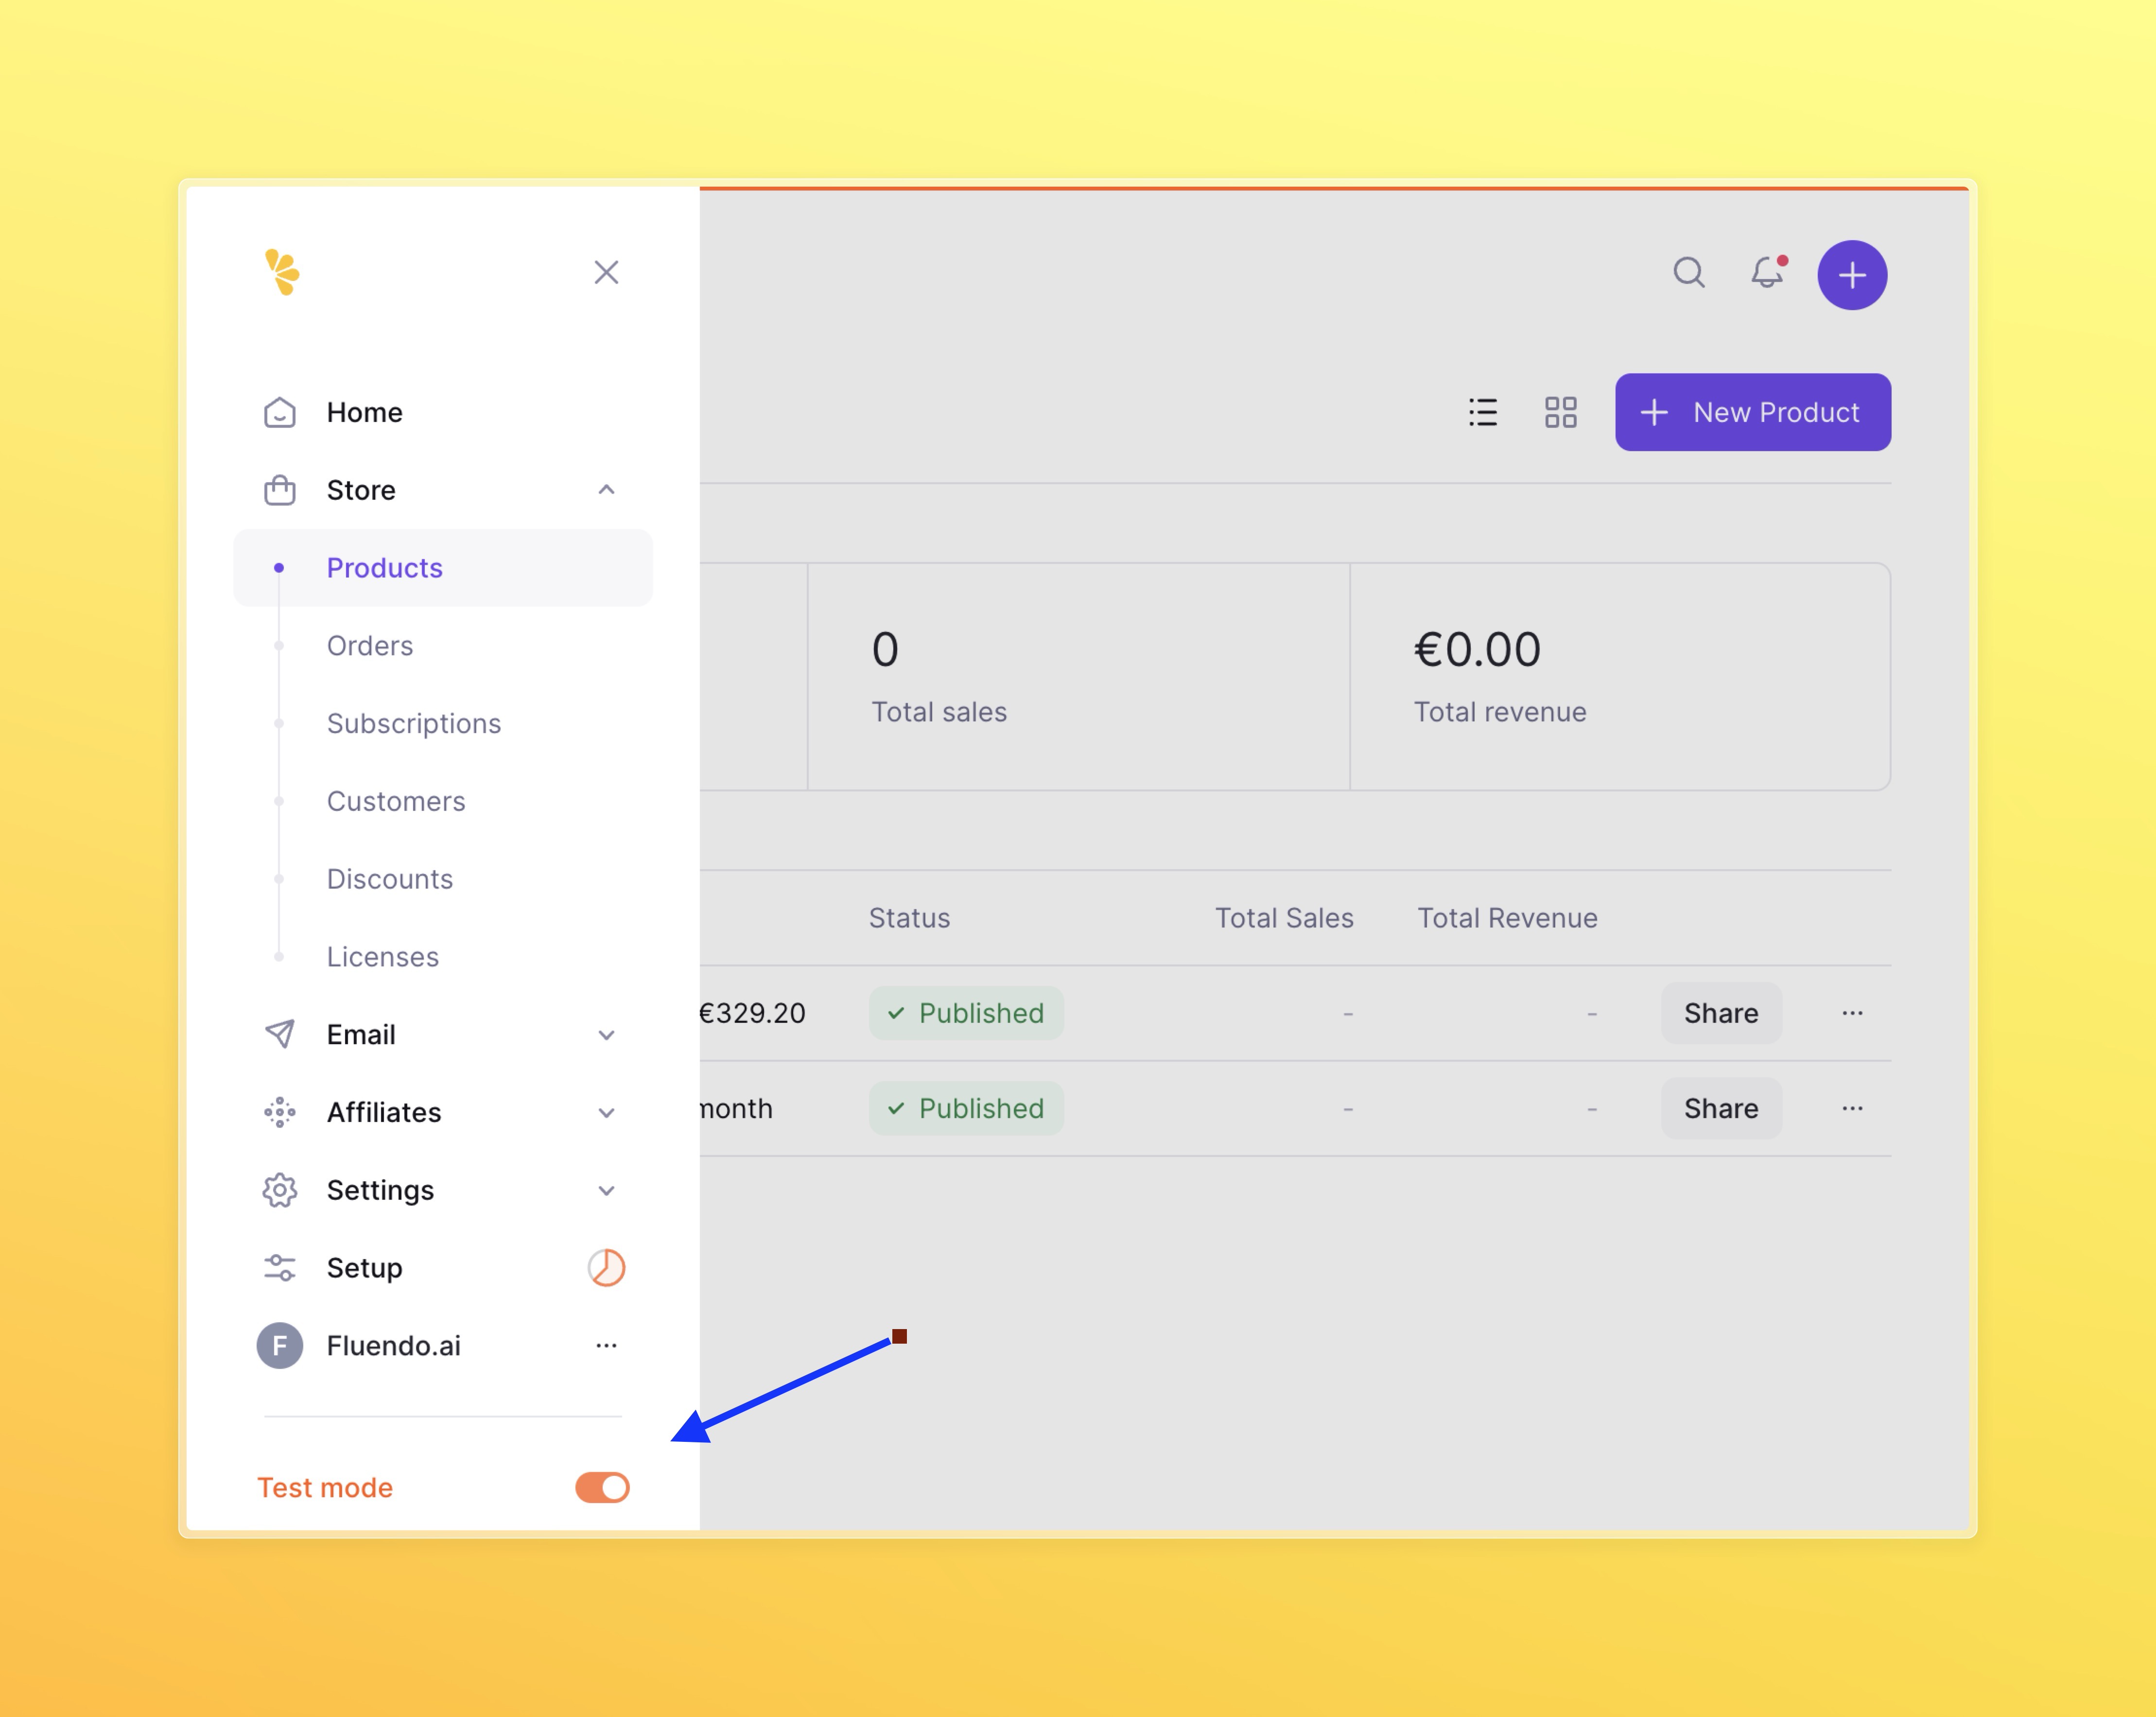
Make sure you are doing all of the below in test mode. You can switch between
test and live in the Lemon Squeezy dashboard.
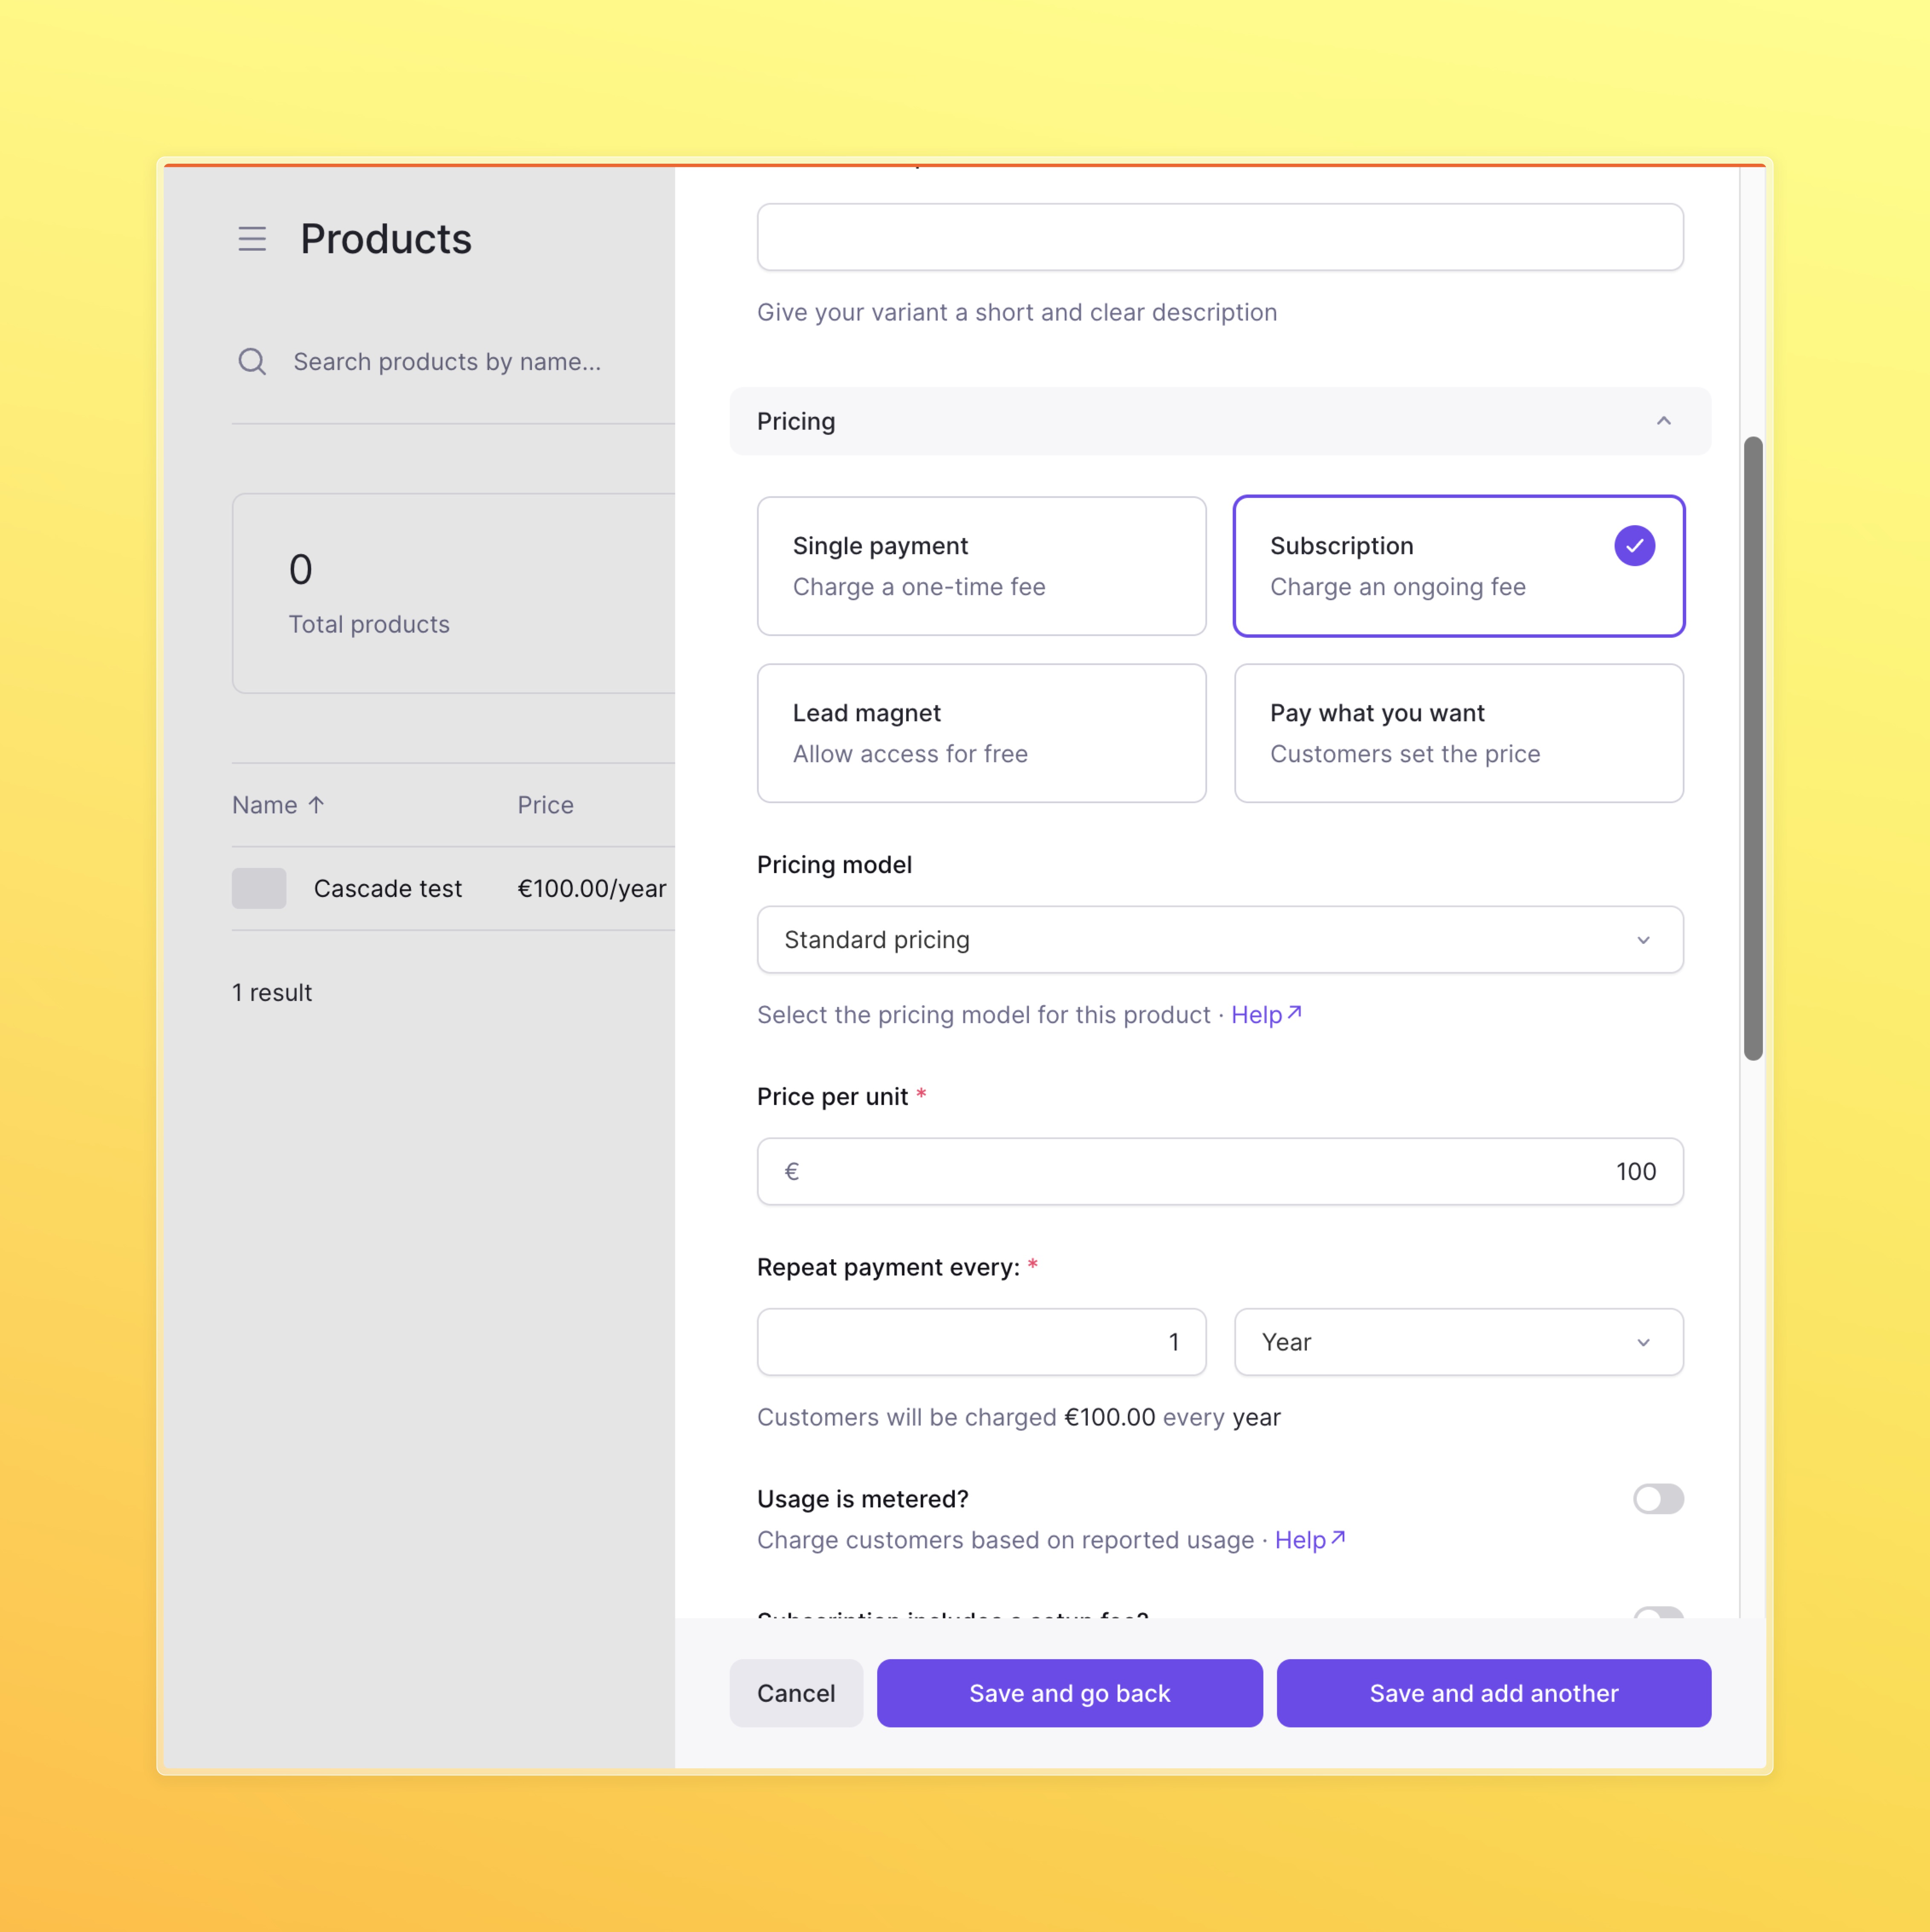
New Product button.
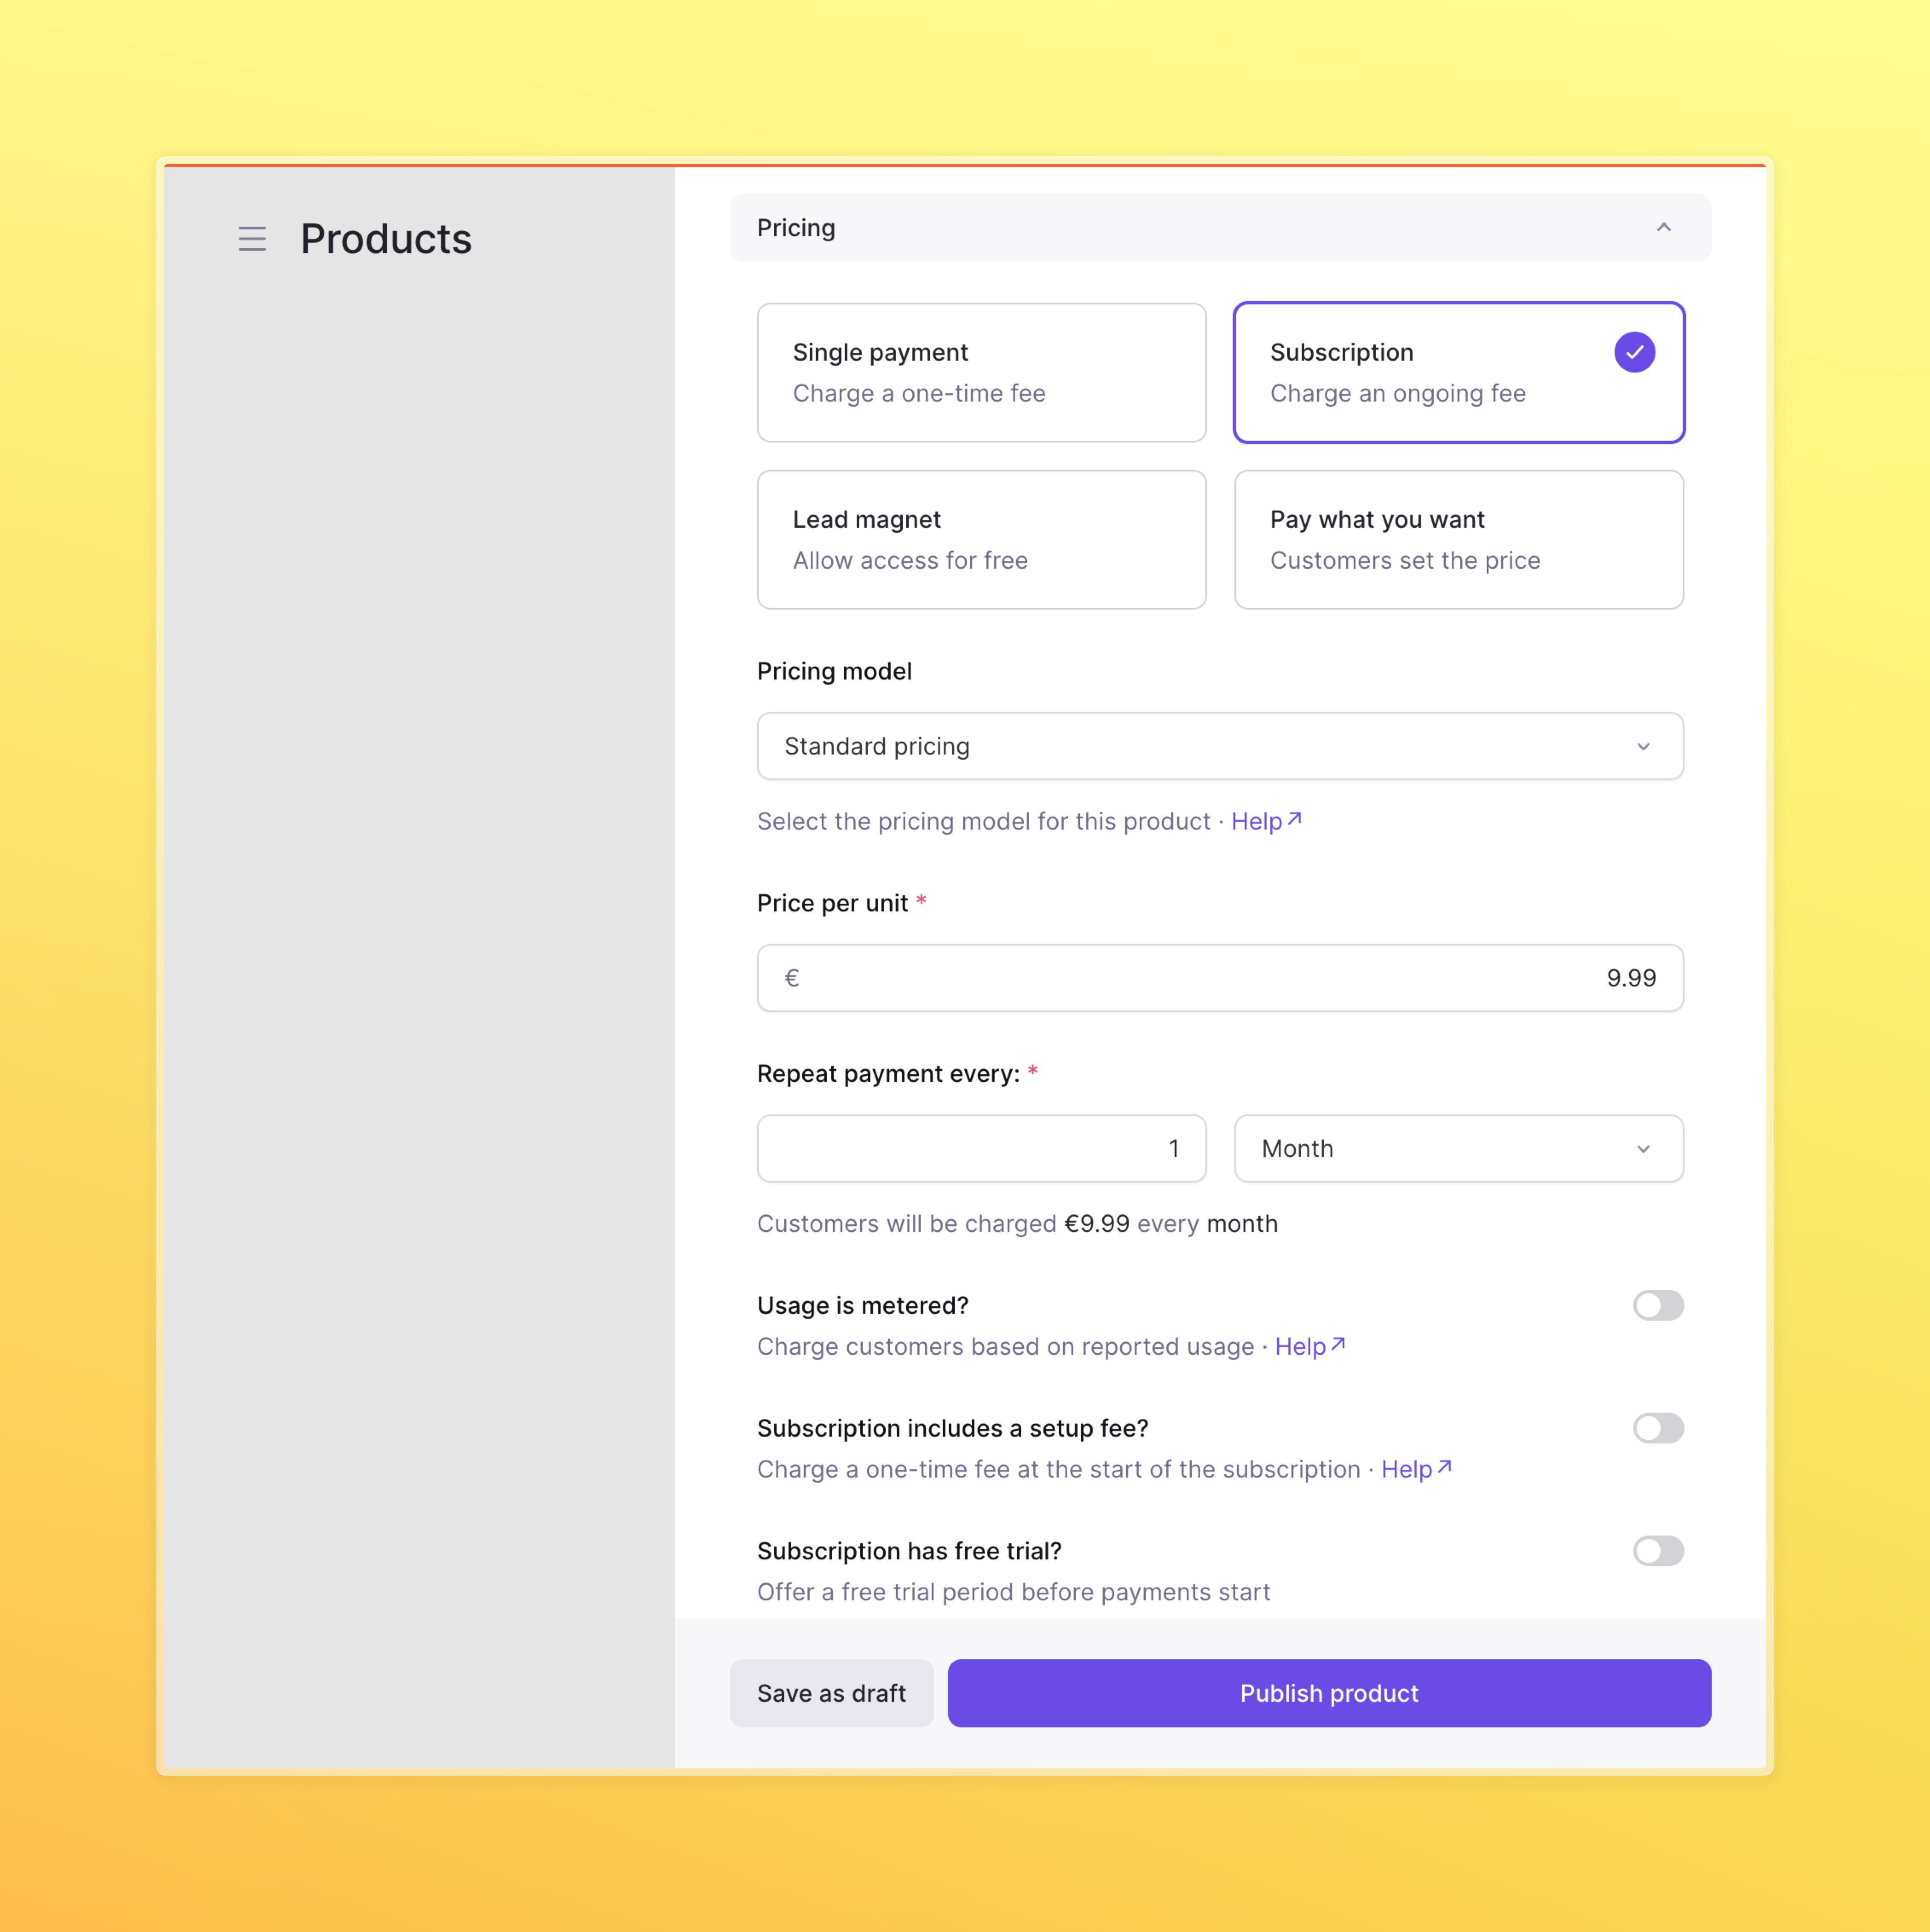
Choose Subscription and select $9.99 as the price for collection every month.
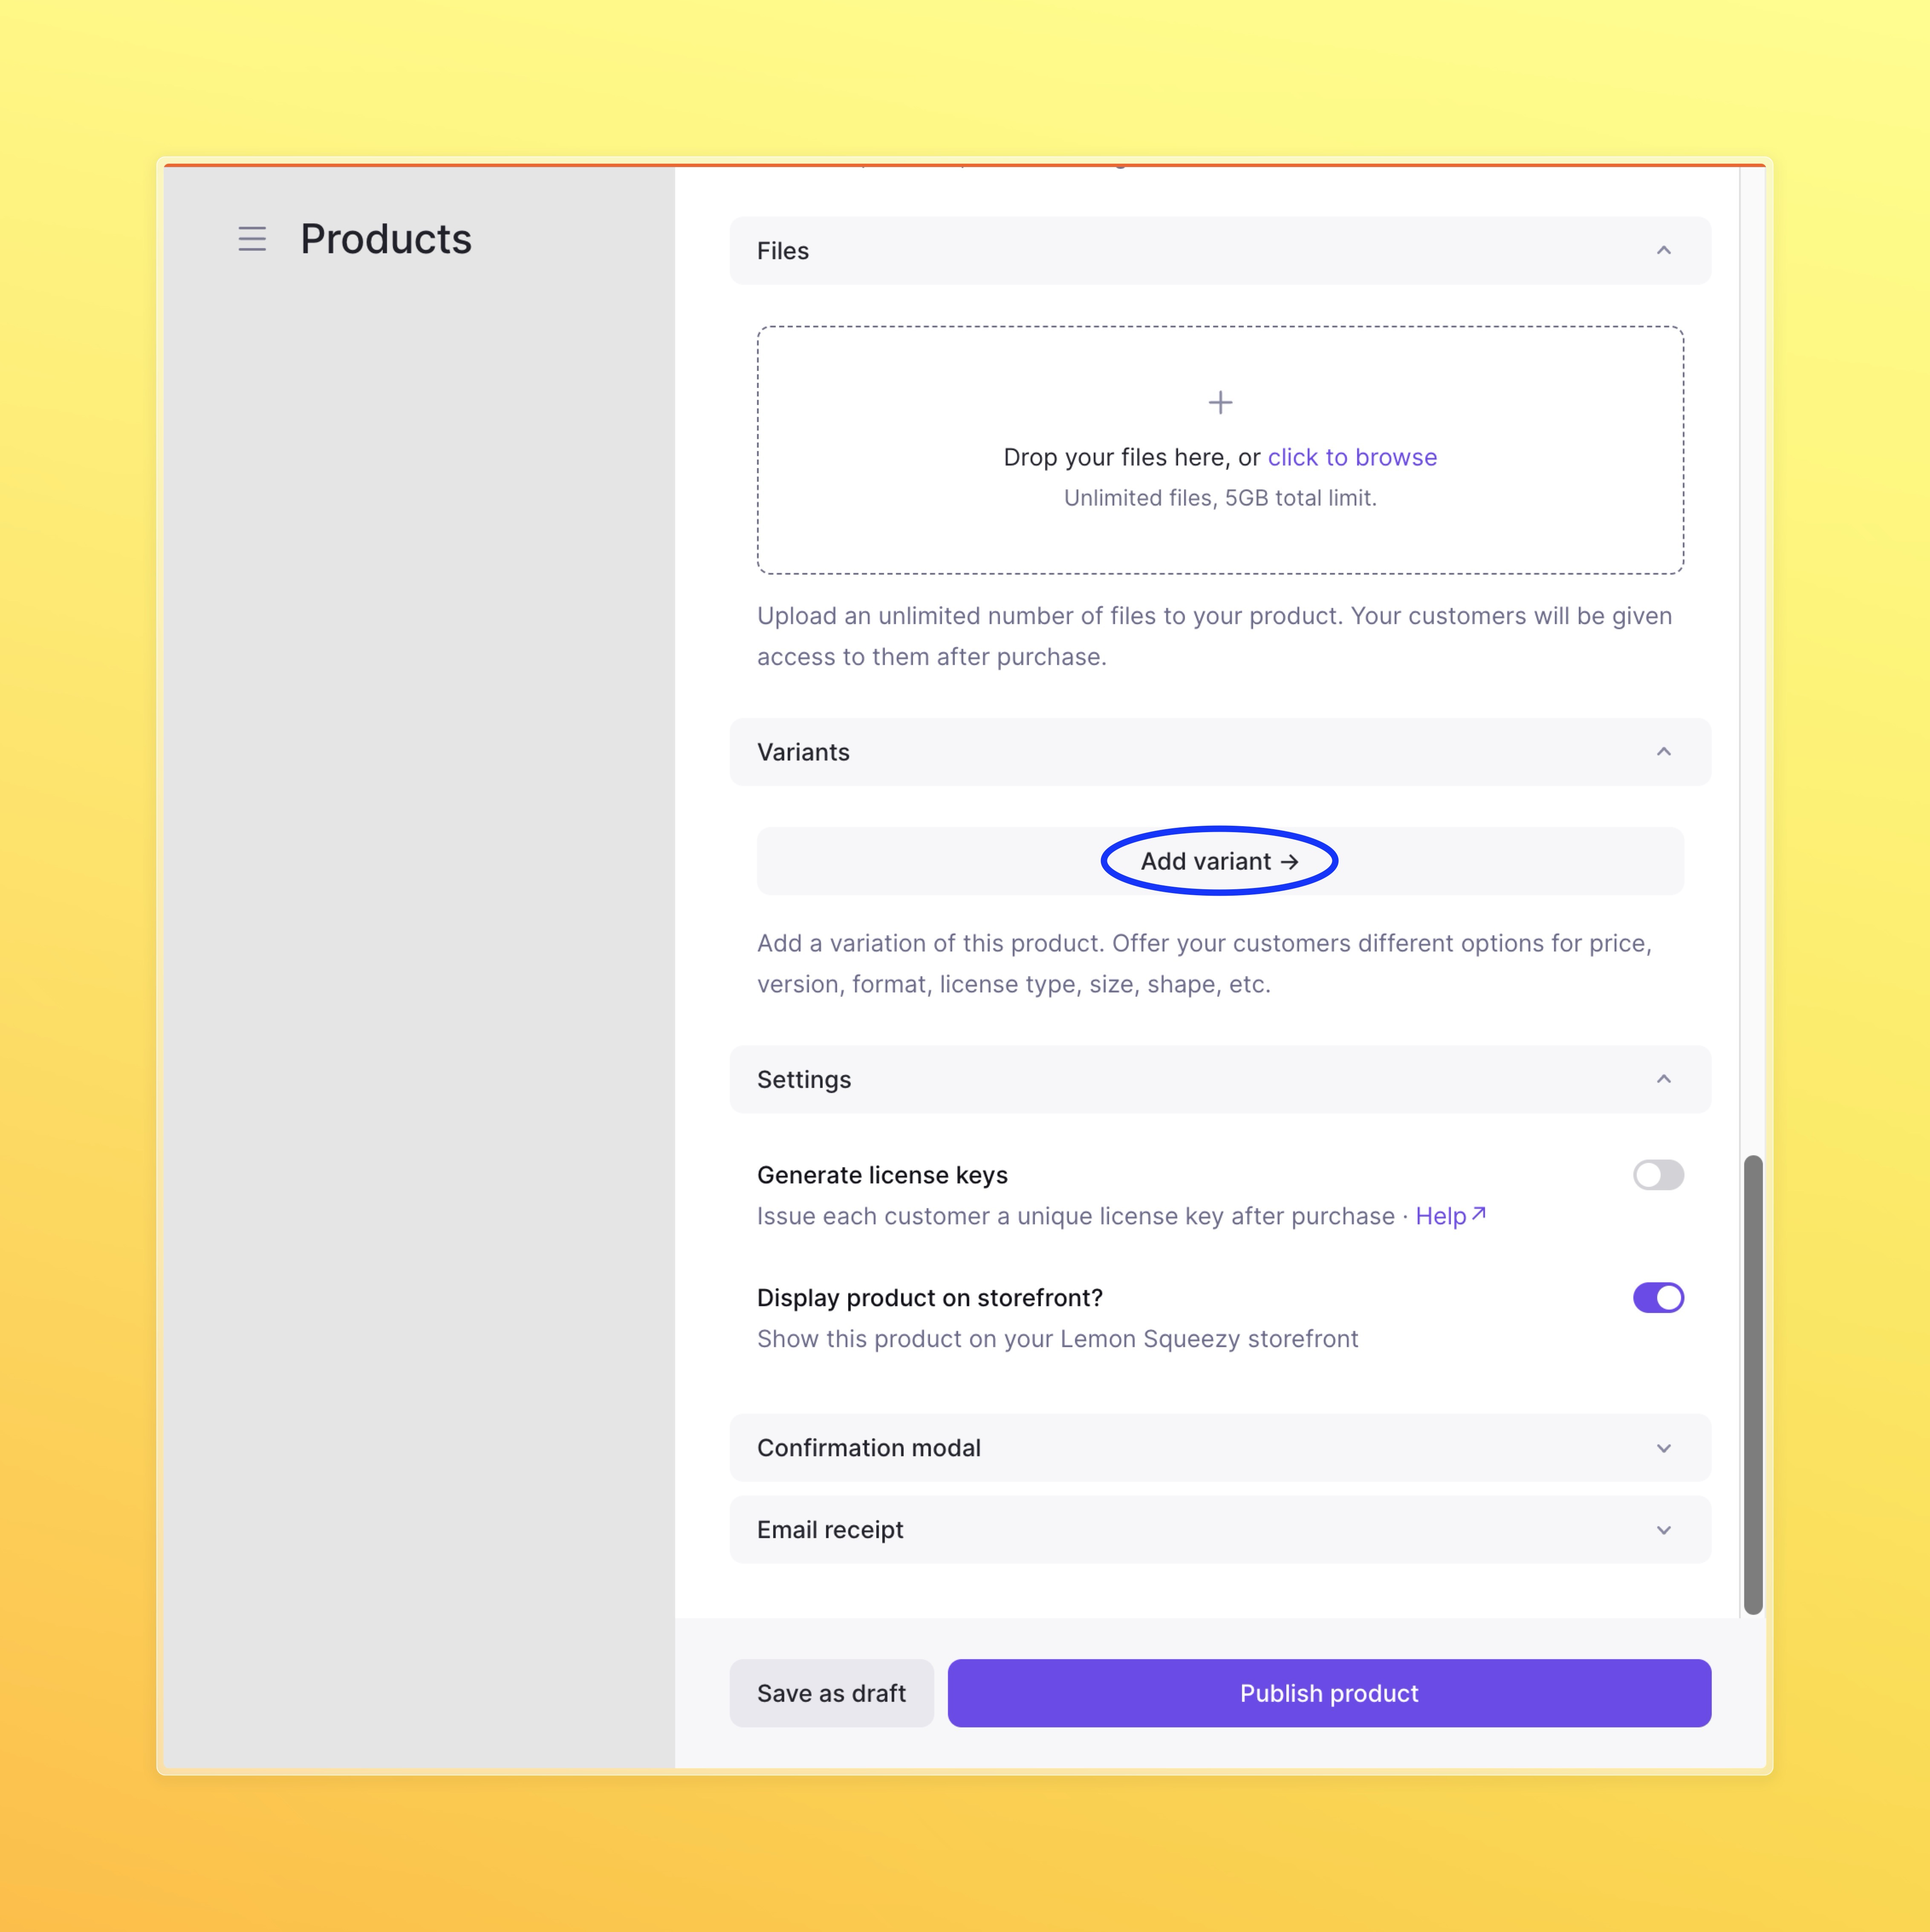
Now let’s creat two variants of this Product, we will call it Yearly & Monthly and set the price to 9 & 100 respectively.
Save your product and variants, you should have deftault monthly subscription and yearly subscription now!
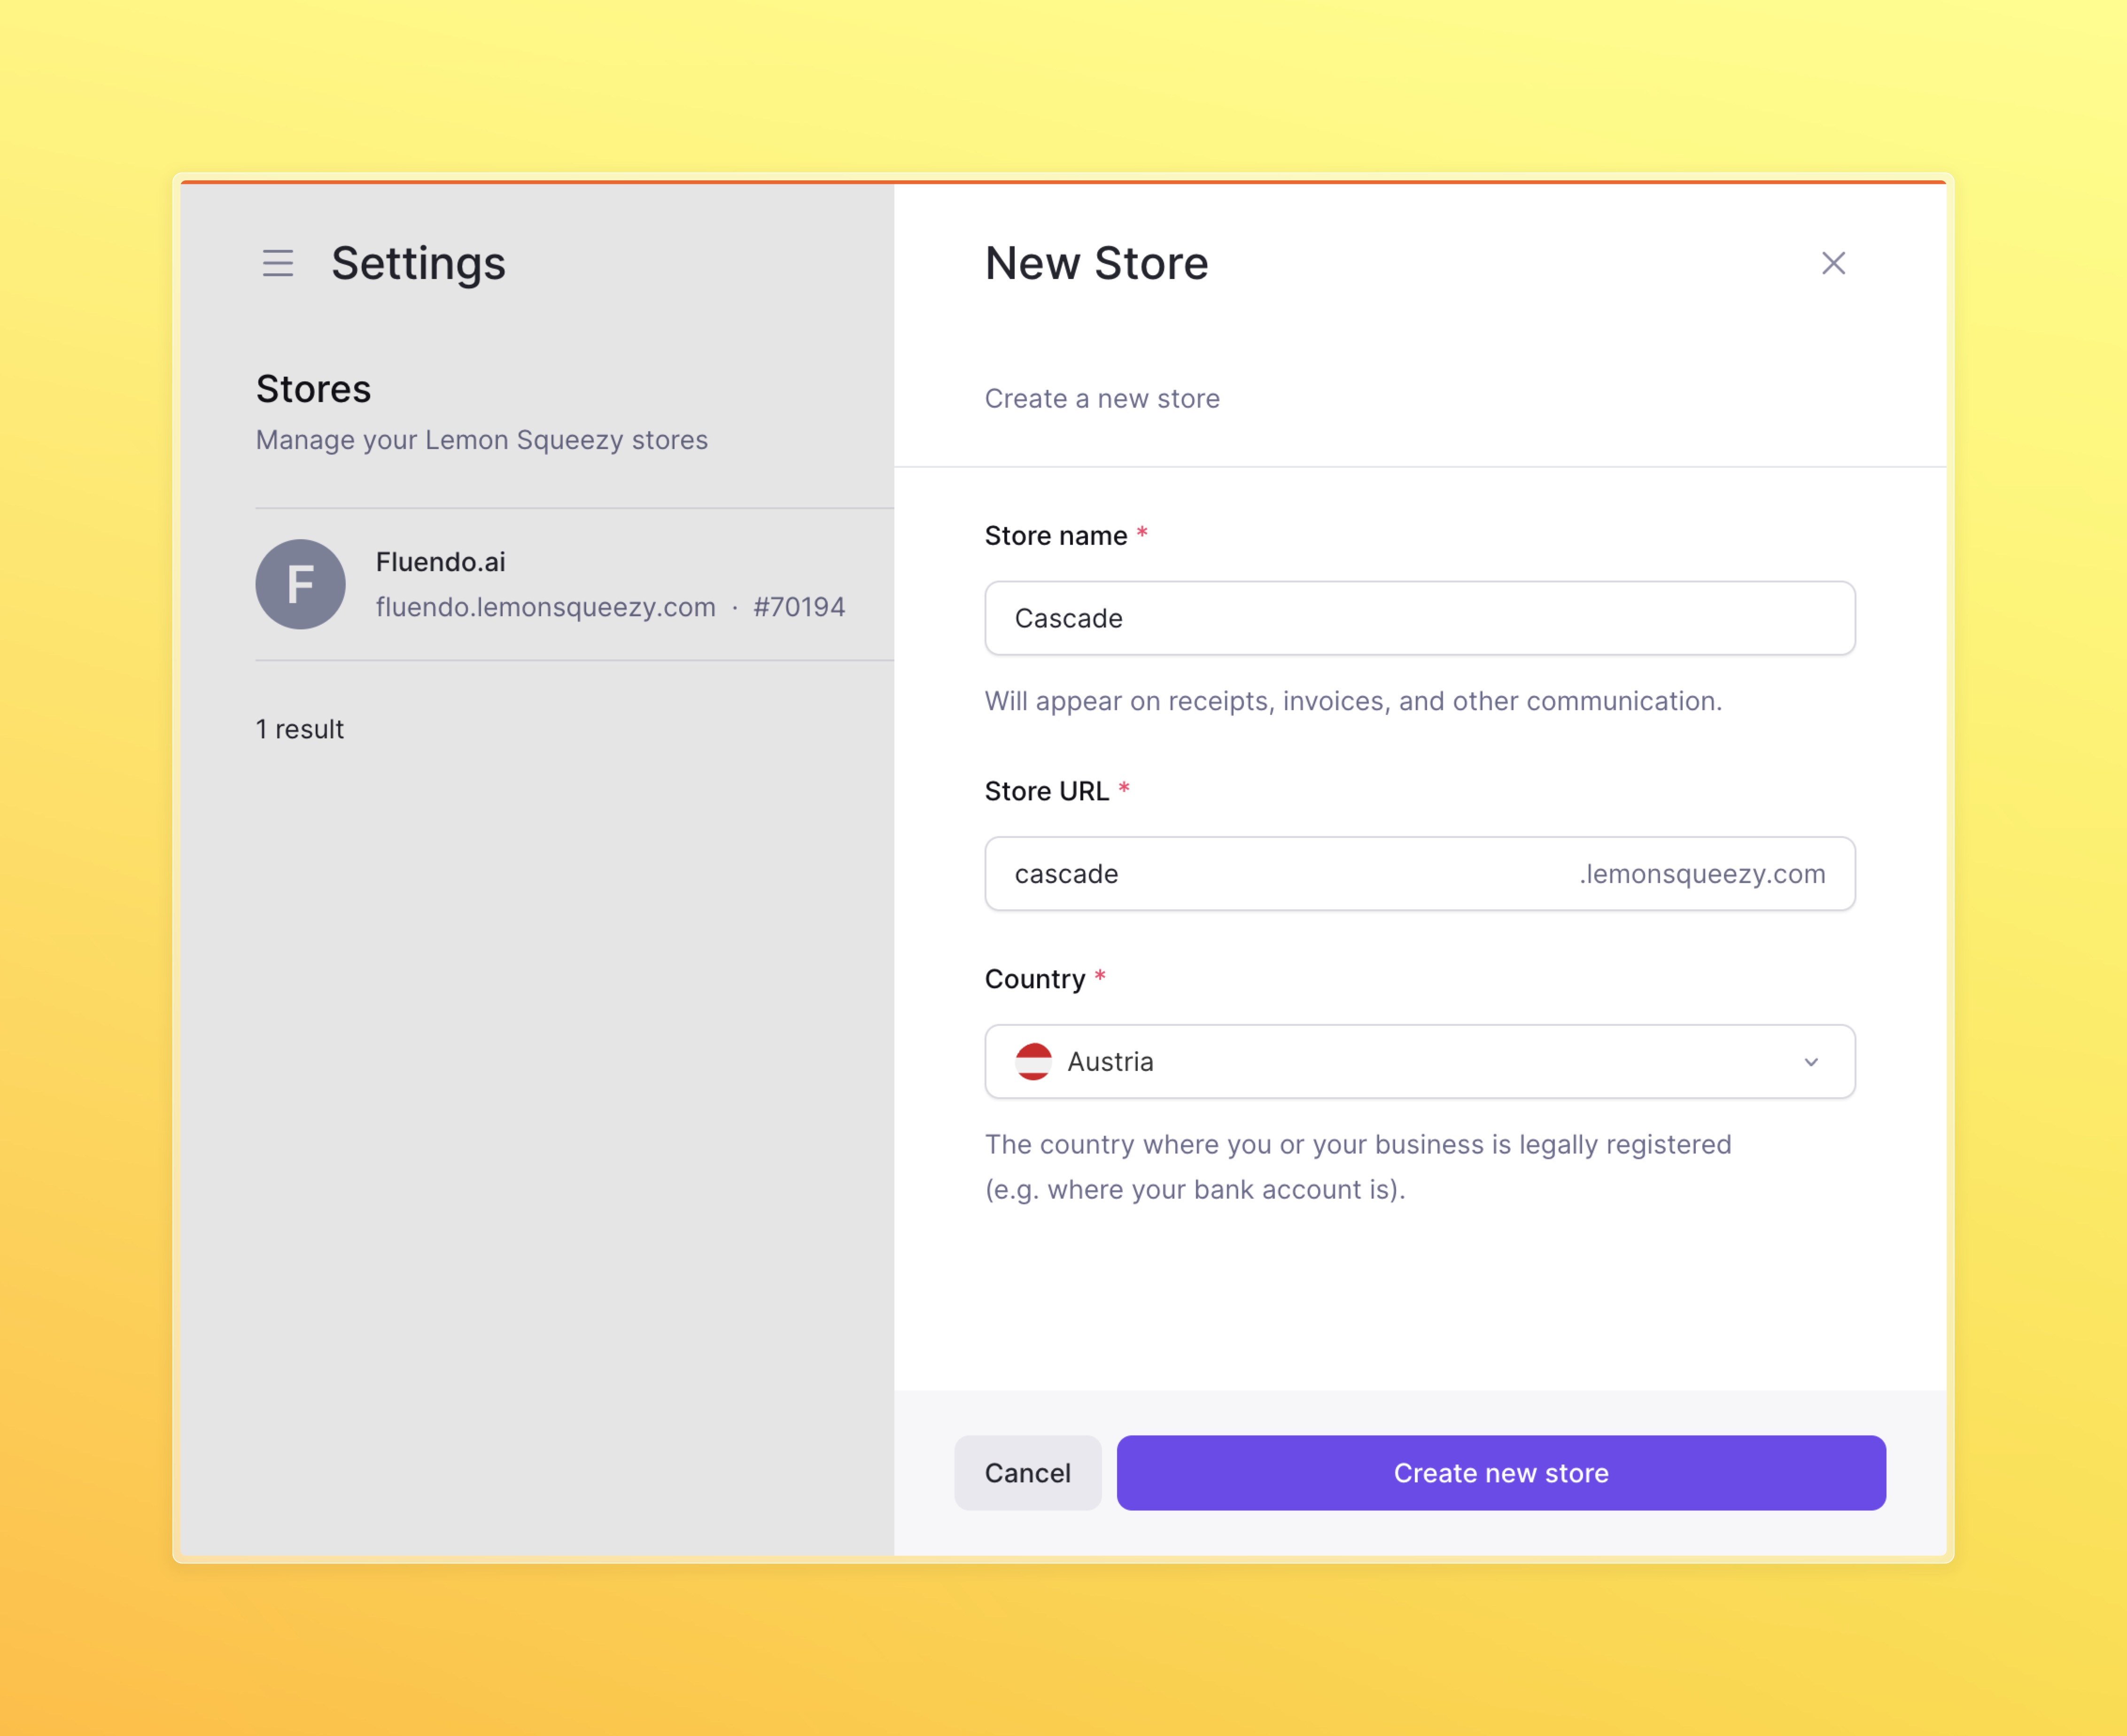
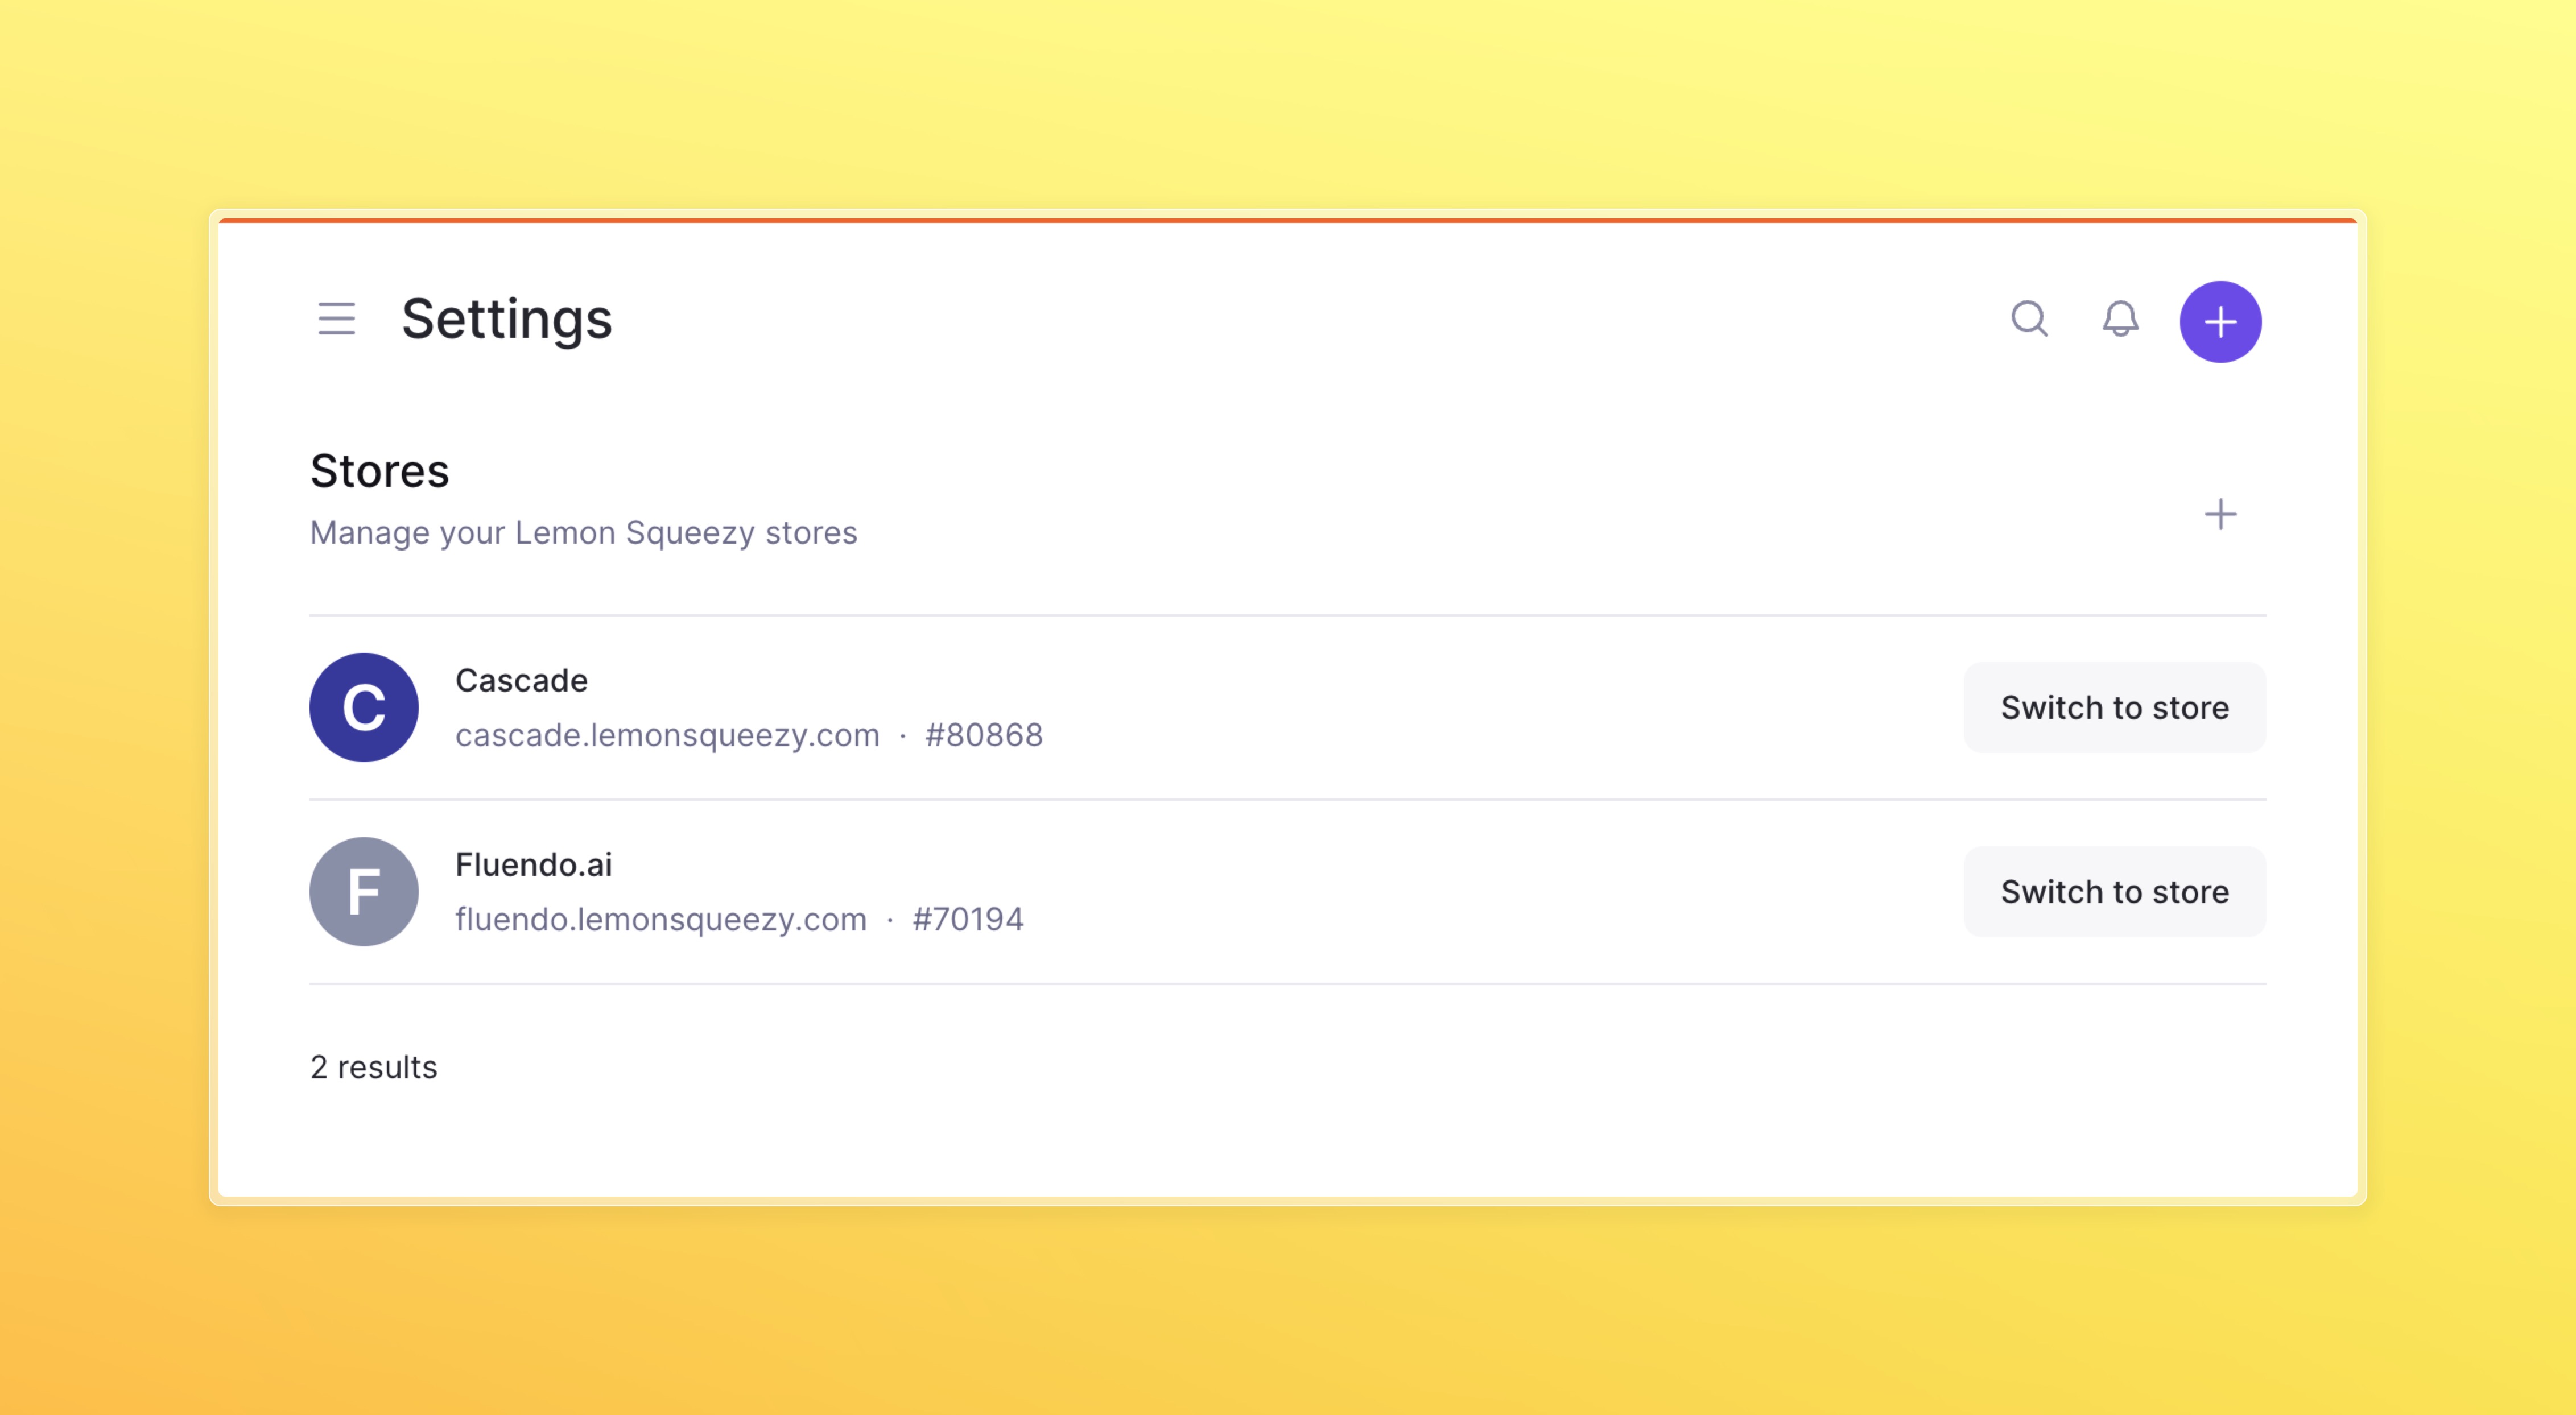
Go to stores page and copy the store ID.
Go to api keys page and create an API key. Copy it as well.
Name your API key corresponding to your store so you could rotate it later if needed.
Setup on Cascade side
Now that you have your store ID and API key, you can set up Cascade to use Lemon Squeezy as the payment provider.
Inside of .env file add the following:
#Lemon Squeezy
LEMON_SQUEEZY_API_KEY="COPY_YOUR_API_KEY_HERE"
LEMON_SQUEEZY_STORE_ID="COPY_YOUR_STORE_ID_HERE"
LEMON_SQUEEZY_WEBHOOK_SECRET="super-secret-long-string"
LEMON_SQUEEZY_WEBHOOK_URL="https://cascade.loca.lt/api/lemon-squeezy/webhook"
We are using local tunnel for webhook URL, you should replace cascade with
your app name and generate correct connection in the next step.
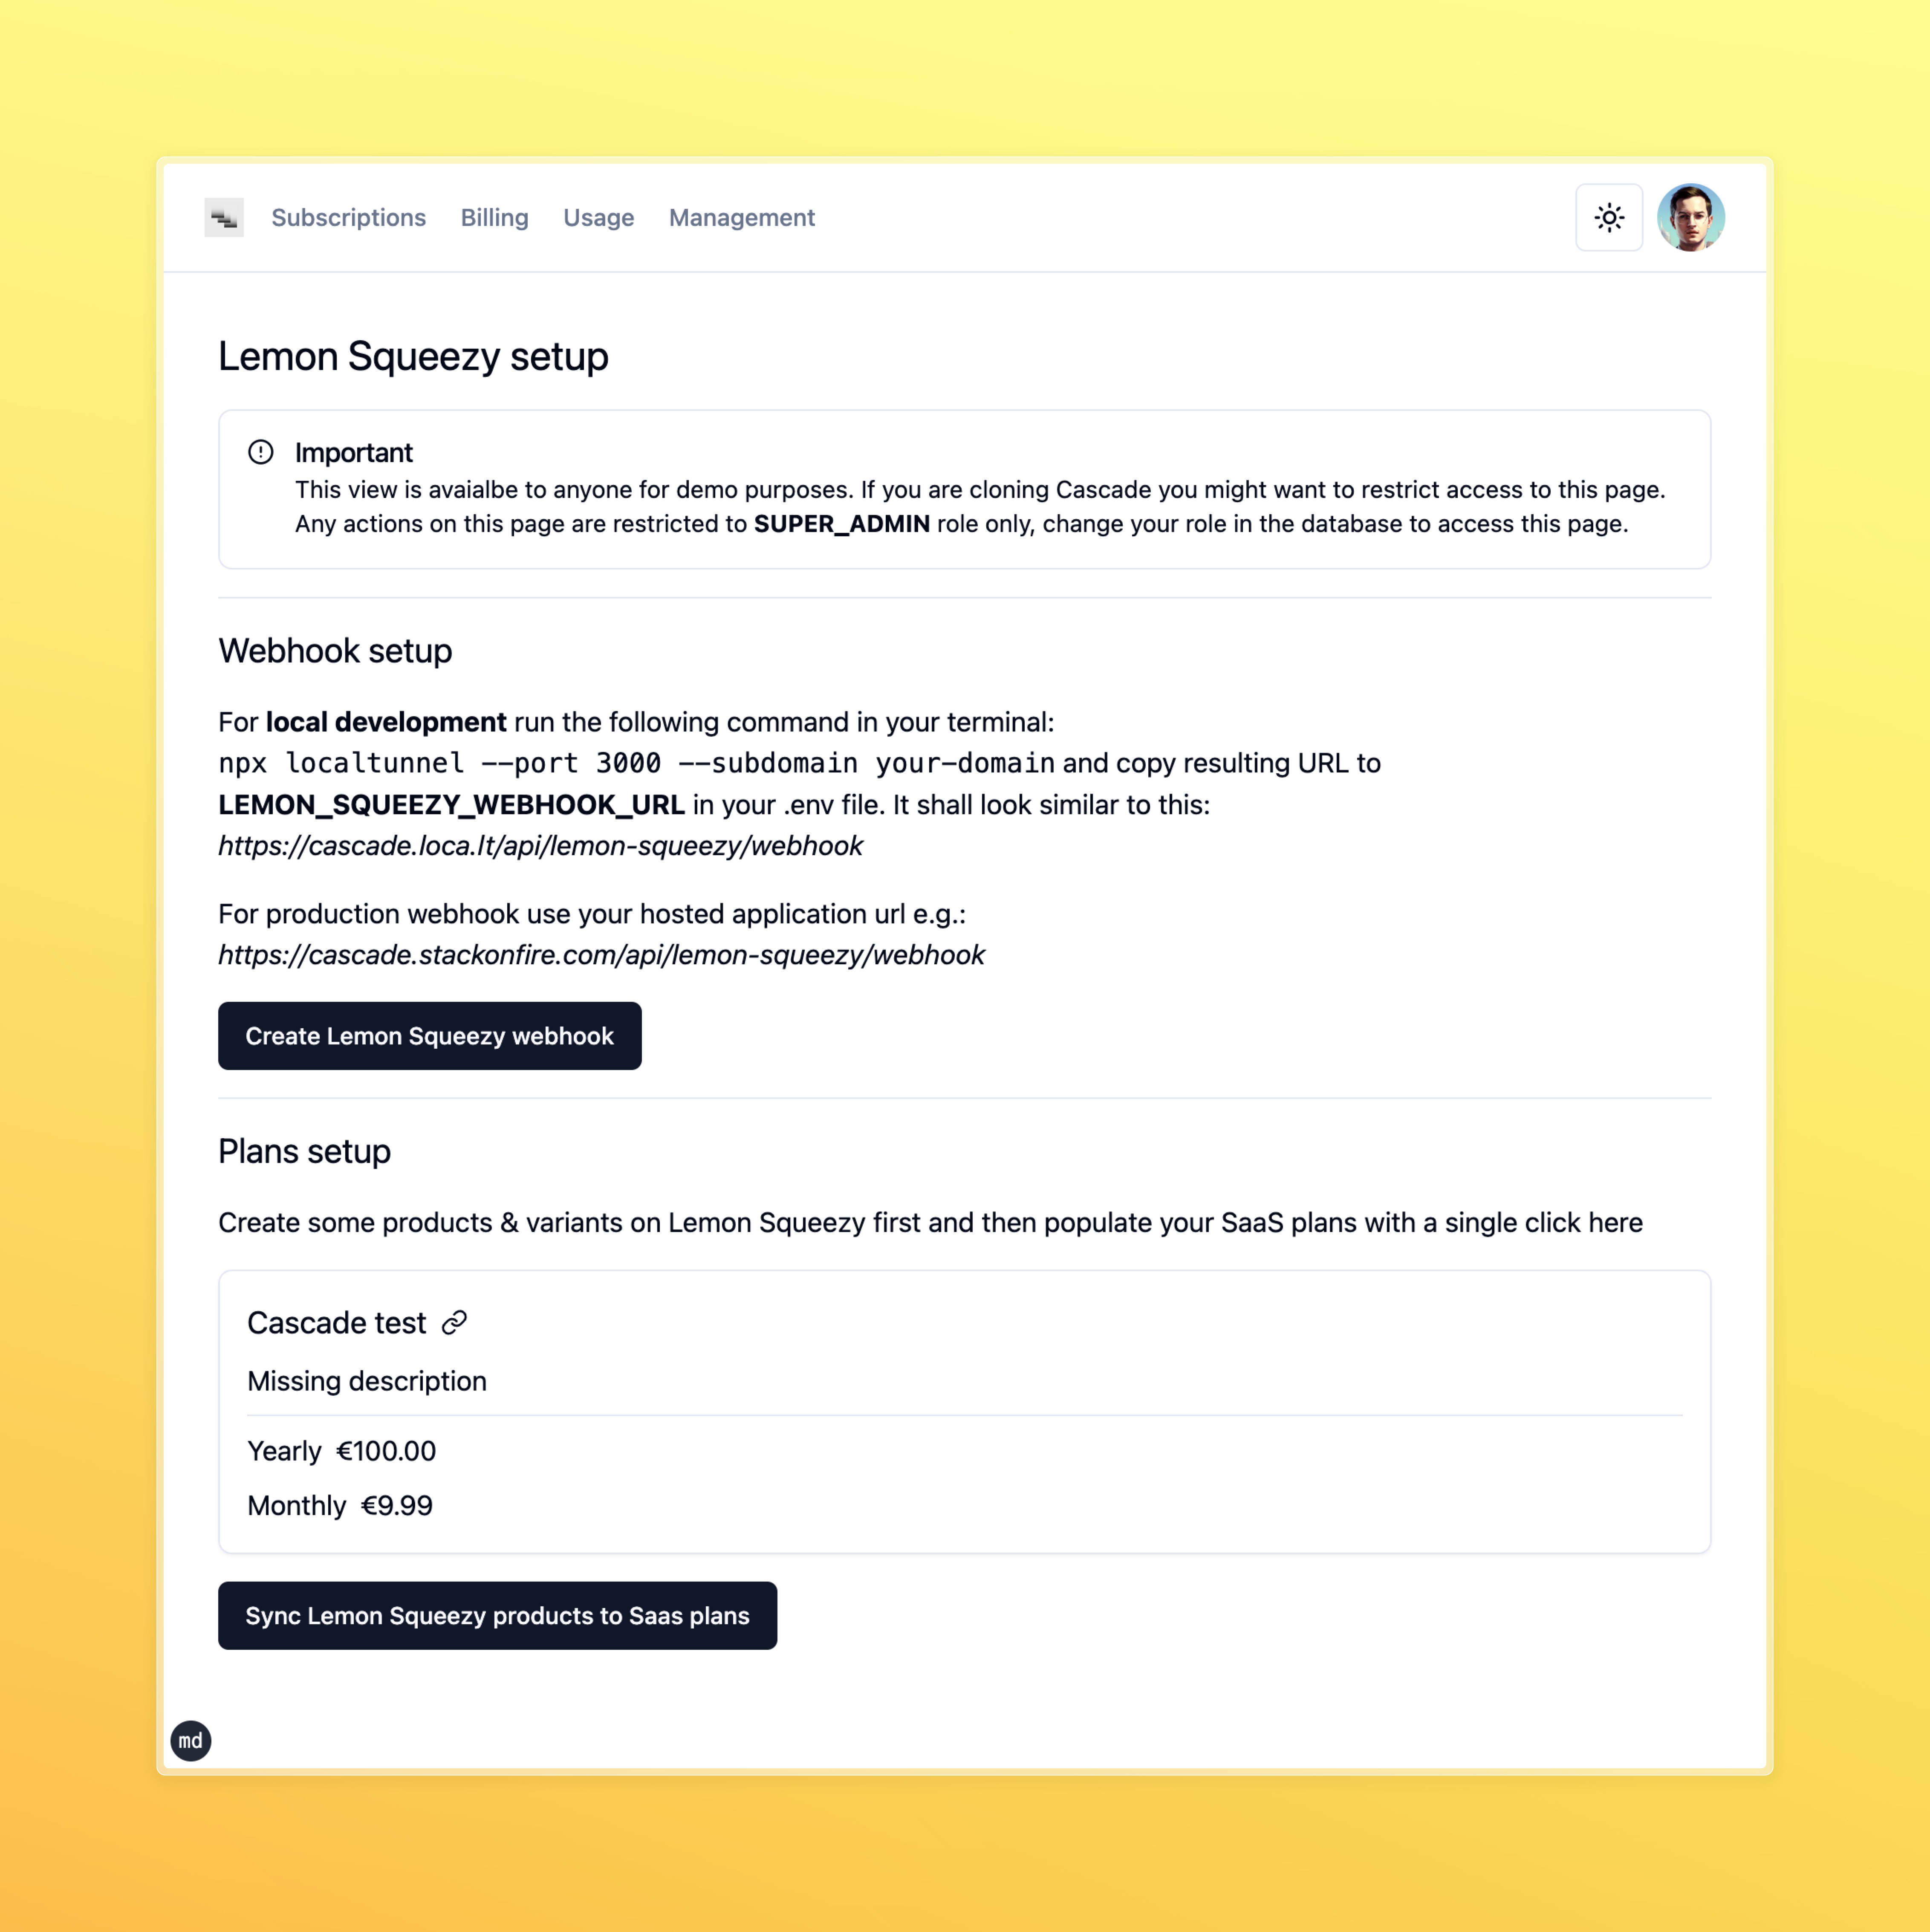
http://localhost:3000/ls-setup
Make sure you are signed in and your user has SUPER_ADMIN role.
npx localtunnel --port 3000 --subdomain cascade with replacing cascade with your domain. This will make sure we are able to receive webhooks from Lemon Squeezy locally.
You can now click two buttons to create a webhook and create plans in our database that correspond to Lemon Squeezy subsriptions.
Create webhook button will create a webhook on Lemon Squeezy side, so we can receive events. This is just a nice utility to setup webhooks without going to Lemon Squeezy dashboard.Sync plans button will create plans in our database that correspond to Lemon Squeezy subscriptions. This is needed so we can match Lemon Squeezy events to our plans.
Working with payment utilities
To make sure we incentivise our users to subscribe to paid plans we sometimes need to block them from using our app. We can do this by using payment utilities.
useGuardedSpendCredits hook will check if the user has enough credits to spend on the given feature. You need to ensure that you Prisma schema has a field for each feature you want to block.
const guardedUsage = useGuardedSpendCredits("buttonClicks");
const {
    guardAndSpendCredits,
    showUpgradeDialog,
    setShowUpgradeDialog,
    isPending: spendCreditsMutation.isPending,
    hasRunOutOfCredits,
    featureCreditsLeft,
    availableCredits,
  } = useGuardedSpendCredits("buttonClicks");
buttonClicks field to your Plan schema & reflect it in your FeatureUsage schema.
When you create plans automatically with syncPlansFromLemonsqueezyVariants
using this guide you need to
manually input the limits for the features in your Database. model Plan {
id Int @id @default(autoincrement())
lemonSqueezyVariantId String @unique
name String
// Paywalled features, this is the number of credits the user can spend on each feature per month
buttonClicks Int?
aiCalls Int?
fileUploads Int?
users User[] // This establishes the one-to-many relationship
}
FeatureUsage model in database. This model will be used to track the usage of each feature for each user. Extent it when needed.
model FeatureUsage {
    id           String @id @default(cuid())
    userId       String
    buttonClicks Int    @default(0)
    aiCalls      Int    @default(0)
    fileUploads  Int    @default(0)

    // Add more features as needed
    date DateTime @default(now())
    user User     @relation(fields: [userId], references: [id])

    @@unique([userId, date])
}
 <>
       <Button
          onClick={() => guardedUsage.guardAndSpendCredits(10)}
          disabled={guardedUsage.isPending}
        >
          {guardedUsage.isPending && (
            <Loader2 className="mr-2 h-4 w-4 animate-spin" />
          )}
          {guardedUsage.hasRunOutOfCredits
            ? "Upgrade to spend 10 credits"
            : "Spend 10 credits"}
        </Button>
      <UpgradeDialog
        open={guardedUsage.showUpgradeDialog}
        setOpen={guardedUsage.setShowUpgradeDialog}
      />
 </>
